
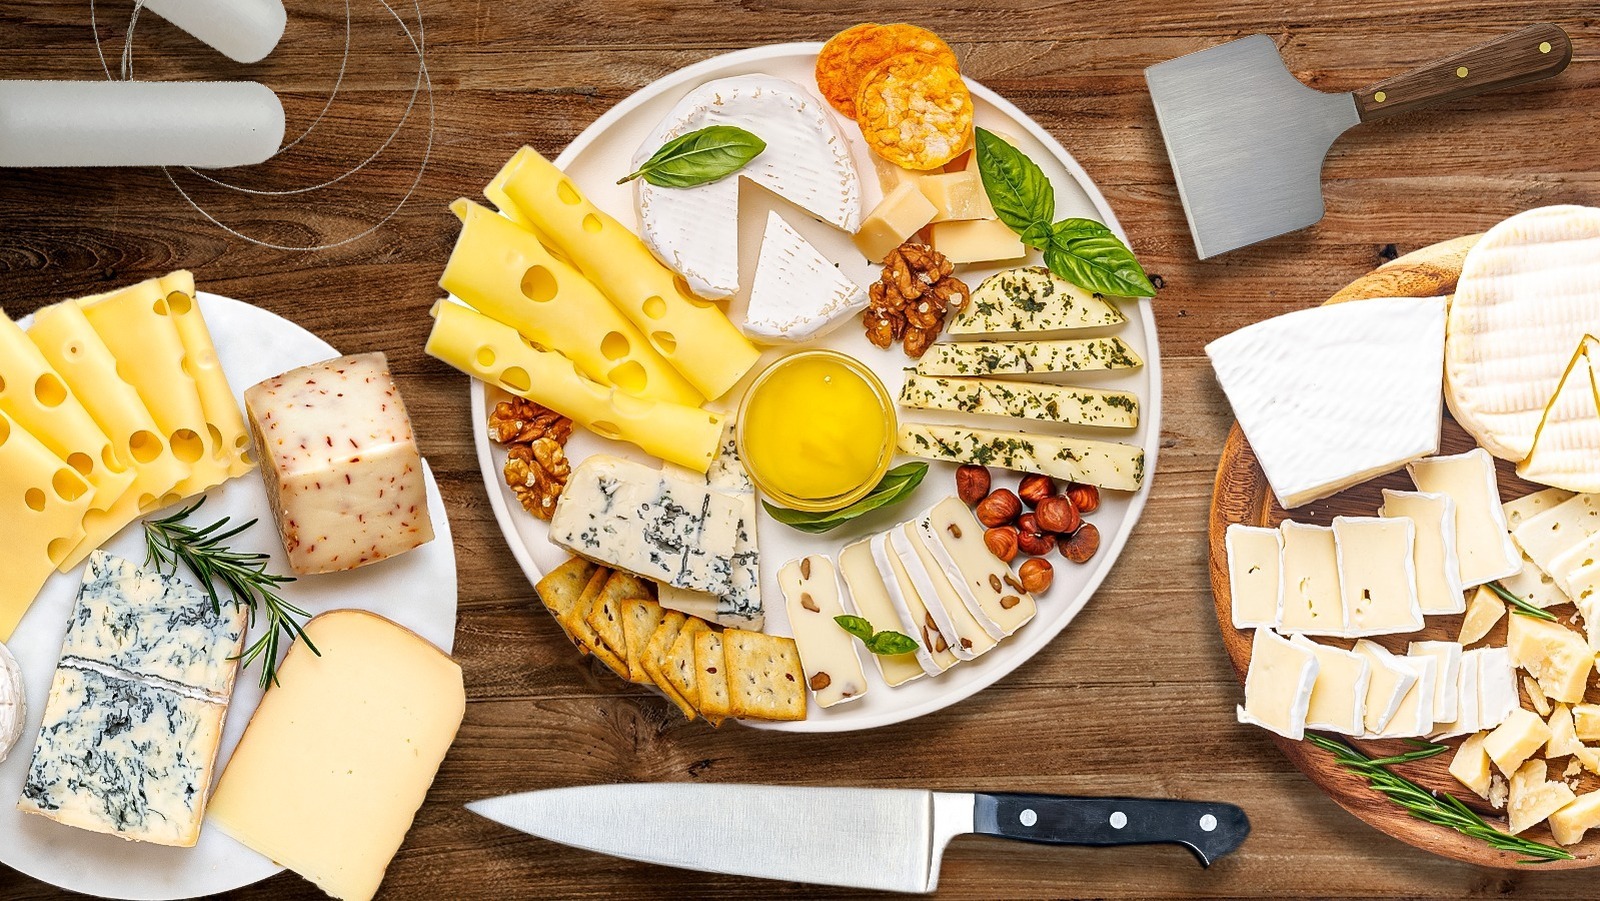
A charcuterie board can be a complete smorgasbord of delights that tantalize and titillate the tastebuds. A charcuterie board should deliver an aesthetically pleasing display that invites the onlooker to dive in and grab a bite, and when it comes to cheese, arranging your selections in different slices can add interest through shapes, textures, colors, and smells.
When building a charcuterie board, consider how many cheeses you will feature; we recommend choosing between two and five for the best impact. The key is to select different types of cheeses that can be displayed in different ways. Hard and semi-hard cheese can be cut into slices, matchsticks, ribbons, wedges, or fans. Soft cheeses like chevre can be rolled in herbs or wrapped in meats. Some cheeses like halloumi can be smothered in sesame seeds and deep-fried.
Don’t forget the accompaniments; they add color and flavor to the board. We recommend you include a range of dried, spreadable, and cured meats, like dry-cured salami or Spanish chorizo. Then, add a sweet element with fresh and dried fruits, like mango, pineapple, raspberries, sliced apples or cherries, or a few chunks of chocolate. Include a savory note with nuts and seeds and a touch of freshness with crudites such as cucumber, pepper, and carrots. Finally, don’t forget the crackers.
To help you create an incredible charcuterie board, we asked three experts for their charcuterie tips and techniques, focused on the best ways to slice and present cheese.
Standard slices
A charcuterie board should be visually arresting, with an attractive display of different shapes, sizes, and colors. Therefore, it’s important not to forget simple solutions like a standard slice of cheese. Whole cheeses come in different sizes, which you can use to your advantage; you can cut them in half or quarters or slice them into thick slabs or the finest of shards. The trick is to ensure that whatever type of cheese you decide, all the slices are the same size.
We asked Kurt Beecher Dammeier, founder and CEO of Sugar Mountain and the award-winning Beecher’s Handmade Cheese, what his recommendations are for slicing cheese. He tells us, “Not all cheeses necessarily need to be cut to serve, but if you do plan to pre-cut your cheese, you are looking for uniformity and to cut each piece to be about 1 ounce — small enough to be bite-size and big enough to appreciate the flavor.” We recommend sticking to semi-soft and hard cheeses like cheddar, Gouda, and Swiss cheese for the perfect cheese slice.
Chunks
One of the simplest ways to cut cheese for charcuterie is to make it into chunks. This method is best suited to hard cheeses like cheddar and Asiago and semi-hard cheeses like Jarlsberg, Comté, and Gruyère. It’s important to bring your cheese to room temperature first, particularly if it’s inclined to crumble like an aged cheddar or Asiago. Our expert Kurt Beecher Dammeier says, “Depending on how warm your room is, remove your cheese 15 to 20 minutes before you serve it. Cheese has the best flavor when it is served at room temperature.” Getting your cheese to room temperature also makes it easier to slice without it falling apart and gives your cheese a fuller flavor.
Again, uniformity is imperative to creating a thoughtful and carefully assembled cheese board. To cut your cheese into chunks, cut 1-inch slices and then slice again so the pieces are 1 inch by one inch. You can upgrade your cheese chunks by placing them on small charcuterie skewers alone or with chunks of fruit, an olive, or a slice of cured meat. If you have a large cheese board, cut different-sized cheese chunks by making the cuts wider or shorter and putting them in different places throughout the board.
Julienne
The julienne is a more unusual cheese cut. To julienne something means to cut it into long, thin strips. Julienne cuts are sometimes called matchstick cuts because the aim is to create uniform slices that resemble matches in a box. Chefs often julienne vegetables like cucumbers, peppers, carrots, or even potatoes to create interesting displays on the plate and to provide a bite-sized crunch as part of your meal.
Julienne your cheese by cutting it into thin slices approximately 5 millimeters wide and less than 2 centimeters long, then slice them again lengthways so they form long strips. The idea is to make them exactly the same shape and size. Julienning is quite fiddly, so it’s best to use hard cheeses that will not melt or crumble. We recommend cheddar, Manchego, or Emmental. Cheeses like Brie and Camembert are too soft, and many aged and blue cheeses are too crumbly. Ensure you chill your cheese before julienning, which will make it easier to cut into fine matchsticks.
Shredded
The key to an impressive-looking charcuterie board is variety, color, shapes, and textures. We asked Julie Goodyke, owner of Graze Craze Charcuterie Boards, for her tips on creating the perfect-looking charcuterie board. She says, “I love to create variety by arranging cheeses in different shapes and textures — fanning out slices, stacking cubes, and leaving wedges whole with a knife for guests to cut. Pairing cheese with complementary items like honey, nuts, fruit, and artisan crackers enhances the flavors and makes the board look inviting. This allows your guests to find their perfect bite!”
Bearing Julie’s advice in mind, shredding your cheese is an excellent way to add shape and texture to your cheese board. It’s also a way to introduce color. Cheeses suitable for shredding include a vibrant red Leicester, a golden cheddar, lemony Gouda, or the pale ivory of a Manchego. To grate cheese for a charcuterie board, run your block of cheese through a grater and pile it on the board or place it in a pretty bowl. You can either mix the different colored cheeses together or create separate, differently hued piles.
Wedges
The wedge is a classic cut often used with wheel-shaped cheeses like Brie, Camembert, or goat’s cheese, which can be sliced several times to create mini triangles or wedges. When slicing a soft cheese like a Camembert, chill it first; this will help it keep its shape, particularly if it has been aged and is slightly gooey. Note that very well-aged soft cheeses will simply collapse when sliced and are unsuitable for this cheese cut. Take any rounded cheese, slice it in half, then again to make quarters. Keep slicing in equal sections until the cheese wedges are the size you are looking for. Take your wedge game up a notch by alternating large and small wedges or placing them in a circle to mimic the natural shape of the cheese.
Julie Goodyke explains that the easiest way to slice soft cheeses is to use a wire cutter, but if you don’t have one available, use a sharp knife and wipe the blade between cuts. Molly Browne, education director with Dairy Farmers of Wisconsin, echoes Julie’s sentiments, telling us, “A cheese wire is a great way to make quick and even cuts on cheese of all kinds. The thin wire can handle soft, delicate cheeses (think super ripe Brie). Soft cheeses naturally stick to your utensils, so soft cheese knives are strategically built to minimize the surface area that cheese can stick to.”
Ribbons
Ribbons can be a contentious cheese cut; Molly Browne explains that when building a charcuterie board, “The key is to tailor the cuts to the type of cheese, aiming for bite-sized pieces with various shapes and textures. I encourage you to think beyond the slice! Most importantly, each piece of cheese should make a sufficient ‘bite’ — not too small or too large to be picked up and eaten by hand.” So, what’s the problem with ribbons? Well, ribbons of cheese are long, thin strips that don’t have much bite; however, twisting ribbons of cheese into spirals creates the ideal bite-sized morsel of our cheese. Not only that, it looks striking on a charcuterie board. The trick to getting the perfect spiral is picking a hard yet malleable cheese and using a vegetable peeler, a micro plane grater, or a sharp knife to create long, thin ribbons. You could choose a Parmesan or Pecorino Romano, which are both hard cheeses that can stand up to being sliced thinly and twisted, as long as they aren’t too aged. Try a Gruyère or a Manchego if you find the taste of these hard Italian cheeses too salty and strong.
Crumbles
Some cheeses are so crumbly they fall apart when you try to slice them, but crumbles on a cheese board are a great aesthetic. Crumbly cheeses like feta, Stilton, Gorgonzola, Cotija, and Grana Padano can be crumbled directly onto your cheese board or placed into decorative bowls, where they can be scooped up and dolloped onto crackers. To crumble your cheese, begin by cutting it into slices or chunks — if it doesn’t crumble all by itself, then use your fingers to break it up. The trick is making the crumbles look rustic with large and small irregular shaped pieces. Molly Browne says, “Challenging preconceived notions regarding what is supposed to go with cheese or appear on a cheese board makes for great conversation, another essential ingredient in any gathering.” Molly suggests using nuts, dried fresh fruit, and olives as borders and dividers to frame your cheeses and charcuterie. This technique works well with crumbles, as you can use your accompaniment to buttress your cheese, ensuring it stays in place.
When we asked Molly more about accompaniments, she said to aim for “crunchy, sweet, spicy, salty, pickled, and fresh. An ideal assortment might include pistachios, cherry jam, hot honey, assorted olives, pickled beets, sliced radishes … and something unexpected, like miso, umeboshi plums, dark chocolate, and roasted chickpeas.”
Fan shapes
Cutting your cheese into thin slices and fanning them out from a central point can create a stunning cheese display that could be the focus of any cheese board. The trick is to cut all the slices of cheese exactly the same. There are no restrictions on what form your cheese needs to take as long as it is thinly sliced — so carve your cheese into rectangles, squares, wedges, or cut rounds of rolled cheese like Chèvre. Once you have a series of uniform shapes, you can fan them in different patterns, think spirals, full circles, or half moons. To create a fan, simply lay the cheese slices next to each other in a line with each side slightly overlapping, then angle the slices outward until they form a fan shape.
Selecting the right cheese is essential for all cheese cuts. When choosing your cheese, it’s important to note that age can affect its texture and consistency. Cheese loses moisture as it matures, which means some cheeses, like Asiago, get more crumbly as they age. Tiny crystals can appear in others, like cheddar and Parmesan, which add to the texture but make them harder to slice into neat shapes.
Pro tip: It’s not just cheese that can be fanned on a charcuterie board; you can also fan your crackers–every element on the board can be used to create interest. Aside from visual appeal, we asked Kurt Beecher Dammeier for his tips on creating a cheese charcuterie board; he said he likes “to plate cheeses in the order which they should be tasted– left to right from the most mild flavor to the strongest flavor.”
Cooked cheese
Cooking cheese causes the fat to melt, which changes the texture and enhances the flavor making giving it a softer, more umami mouthfeel. Some of the cooked cheeses that could be included on a charcuterie board include baked Brie, which can make a stunning center point, or halloumi, which can be cut into fingers and incorporated into the overall theme.
To include a baked Brie in a charcuterie board, you need to contain it once it is cooked. Brie liquefies when heated, so if your baked Brie isn’t placed in a pot, the gloopy cheese may run into the rest of the board running the aesthetic. To avoid this, simply place the Brie into an oven-proof container before cooking. Once ready, you can drizzle it with honey or decorate it with seeds, nuts, herbs, or fruits.
Halloumi is a spectacular cheese that only reveals its depth of flavor when cooked. Serve halloumi on a cheese charcuterie board by slicing it into 1-inch-thick fingers and deep-frying. Level up by coating the halloumi fingers in flour and egg before rolling them in sesame seeds. The halloumi can then be fried to create the most incredible crunchy, crispy, soft treat. Stack the halloumi sticks in Jenga fashion for the greatest visual impact.
Rolls and wraps
Soft cheeses like chèvre, ricotta, and cream cheese are ideal for creating little rolls, wraps, or parcels. You can wrap your soft cheese in cured meat; think prosciutto, parma ham, salami, or fresh herbs like thyme or basil. Alternatively, you can roll your cheese in dried herbs, crushed nuts, seeds, or spices like paprika or pepper.
The key to the perfect cheese roll or wrap is to chill the cheese first. Place your cheese in the fridge for a minimum of 30 minutes, then place it on some cling wrap or parchment paper and roll it into a log shape. Place the roll back in the fridge until you are ready to use it. At this point, you can either place the entire roll on the charcuterie board or cut it into rounds.
The process is similar when adding cured meats, herbs, or nuts. You simply need to ensure that you place them on the plastic cling wrap first. With loose ingredients like dried herbs or spices, you can roll the cheese around before wrapping. With cured meat or fresh herbs like basil, wrap them around the cheese first.
Burrata
Burrata is such an incredible cheese that you could dedicate an entire charcuterie or cheese board to it alone. This glorious cheese comes from Italy. It’s a cross between mozzarella and creamy curd cheese — it has a slightly rigid ball-shaped exterior that explodes with a river of creamy curds when cut into.
Burrata is often served by itself with little more than a drizzle of olive oil and a pinch of sea salt, and it is perfectly acceptable to serve it like this on your charcuterie board. For a sweet twist, burrata pairs very well with fruits like peaches, nectarines, and figs. Present your burrata surrounded by sliced peaches or halves of figs drizzled with some honey and scattered pistachio. For a savory concept, the classic combination of tomato and basil never fails–place a whole burrata on a bed of fresh basil and sliced tomatoes with a glug of olive oil and a splash of balsamic vinegar.
Burrata is a show-stopping cheese. While it is possible to cut it into chunks, it looks best when served whole. The first cut and release of the cream and curds are part of the ritual of eating burrata. Remember, burrata tastes best when served at room temperature, so take it out of the fridge beforehand.


